Manga Deny
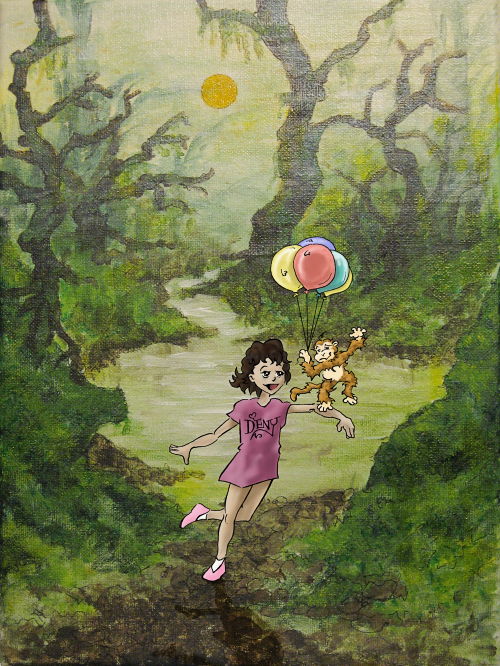
Here is the final fruit of my labor. Manga Deny, though it looks simple and mostly unimpressive, it is one of my most ambitious works of 2006, a relatively artistically fruitless year for me. I say ambitious because all in one night I painted my first scene in perhaps ten years, started the path towards intentional discovery of a new style (manga), and a bit of putting it all together.
In a single day, December 21st, I created this piece from start to finish. Here is the process I went through to make it happen:
- Drove by work to pick up a small canvas.
- I rummaged through the storage closet and decided which art supplies would be useful for the project. I was able to locate some plastic palette dishes, 3 brushes, and a selection of acrylic colors left over from my basic design class at PSU.
- I decided on a jungle setting, perhaps because Fred the Monkey would be in the scene. A vague memory caused me to look up the cover art of an old SNES game, The Secret of Mana. I printed the image for inspiration. It probably didn't influence my jungle except perhaps my attempts at mixing colors.
- While at Target I searched for art brushes only to discover they don't have brushes of any variety (perhaps availability changes seasonally?), not even for home improvement! So I had to make due with what I already found around the house.
- Completed the acrylic background painting.
- Details (fine black outlines, sun, yellows and highlights throughout) were added with Copic markers over the acrylic.
- Read the interesting overview of the Manga comic style as presented in Manga Mania (Christopher Hart). I browsed through the artwork in the book and tried to quickly absorb some inspiration.
- In preparation for my Manga drawing, I followed one of the step-by-step drawings in the book, sketching a simple youthful head in the manga style.
- Penciled the outline of the girl's figure and the monkey with balloons.
- The pencil was erased and covered with a black ink pen with varying line thickness.
- Scanned the drawing.
- Converted the line drawing to 2-bit (black and white) in Paint Shop Pro and redrew several of the shifty lines with my graphics tablet and pencil tool.
- Created a layer with just the outlines.
- Created another layer beneath the outlines and digitally painted in each region with a choice color, adding dark and light variations and blending for illusion of depth.
- Softened colors and applied an art media filter to give the colors a faint painted look and texture.
- Digitally photographed the finished acrylic painting, color and lens corrected, cropped.
- Positioned the figures over the background, added basic shadow and printed on glossy paper, matching size of the original painting exactly.
- Cut out printed figures and back-taped them onto the painting.
This digital final version is technically the best because the incorporation of the elements is seamless. The cutout and taped version is a little less professional. Unfortunately I didn't have a way to paint the figures directly in the painting because the details would be too small, and the brushes I had were poor.